Contents [show]
Are you tired of seeing your bird bath almost tip over whenever a strong gust of wind rips through your backyard? This topic grabbed my attention when it nearly happened to me. To prevent this tragedy, I researched anchoring and learned powerful techniques for how to stabilize a bird bath that I’ll share with you below.
Ground leveling is a common anchoring technique. Find the perfect spot for your bird bath. Choose one that’s relatively level. Measure the base of the bird bath and dig a 1-3-inch-deep hole using the measurements. Use a spirit level to confirm that the ground is even. Place the bath in hole, drive the stakes into the ground, and cover it with gravel or concrete slabs.
I’ve only scratched the surface of the information I’d like to share with you today. I have other interesting techniques and items of importance to share that include:
- The concrete block technique
- The flagstone anchoring process
- The pedestal slab stabilizer
- The ground leveling technique, step-by-step
- Preferred equipment and material
- Hiding the evidence of anchoring
Are you ready to rock? Let’s get moving now…

Concrete Block Technique: A Complete Overview
As the saying goes, “There’s more than one way to peel an orange.” Guess what? There’s more than one way to stabilize or anchor a bird bath too.
That’s where the concrete block technique comes into the picture. It’s easy enough to accomplish and it only requires implementing a few simple steps.
They include:
Step #1: Measure the Base of Your Birdbath
To kick things off, you need to begin by measuring the base of your birdbath. You can technically accomplish the rest of the steps without measuring the base, but it will be a lot easier if you take a minute to get the right measurements.
Basically, you’re trying to determine the circumference of the hole that you’re about to dig next.
Step #2: Excavate A Hole

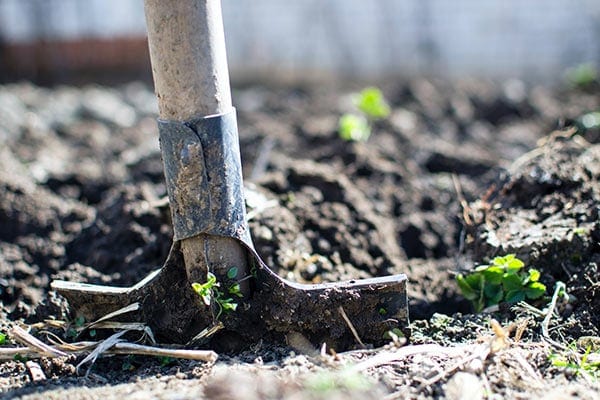
Do you have your spade shovel handy? Excavating a hole is a fancy way of saying that it’s time to do a little digging.
Read your measurements (see I told you they’d come in handy) and use them to measure a perimeter on the ground in the location where you intend to install your birdbath.
As you dig the hole, make sure to dig deep enough to provide ample room for your bird bath base. For the most part, roughly 4-6 inches should be more than enough.
Step #3: Add A Layer Of Gravel
Next, add a thin layer of gravel to the bottom of the hole. This will provide strength and stability to keep the bird bath base steadily in place without moving.
Step #4: Insert Concrete Block Or Slab
Determine whether or not to add 1 or 2 concrete blocks or slabs based on the size of your concrete. Add it to the hole and use a spirit level to make sure that the concrete is perfectly level.
Step #5: Install The Birdbath
At this point, it’s time to gently place the bird bath on the concrete blocks or slabs. Test it to make sure it’s stable by rocking it back and forth or attempt to tip it over to see what happens.
Does it stay level? If not, you need to go back and level the ground again, level the gravel, and level the concrete blocks once more.
Step #6: Add A Second Layer Of Gravel
Is there additional space left in the hole? If not, you didn’t dig the hole deep enough. And you may need to start over from scratch.
If there’s still room in the hole, add another layer of gravel to cover everything up. Feel free to allow the gravel to spill over outside of the hole to completely cover its existence. This will help hide the evidence showing that you anchored the bird bath into the ground and it will make everything look neat and tidy as well.
Related reading:
- Buyers Guide To Select The Best Solar Bird Baths
- The Definitive Guide To Buying Bird Baths
- A Review Of The Best Heated Bird Baths You Can Buy
Flagstone Anchoring Process: The Gritty Details
Now I’d like to share the steps involved with anchoring a bird bath using a flagstone anchor. The steps include:
Step #1: Complete Steps 1-5 Of The Concrete Block Technique
Instead of rewriting the initial steps over, I’d like you to read the concrete block technique and follow steps 1-5 to get started. The only major change takes place at step 6.
Step #2: Fill The Rest Of The Hole With Gravel And Cover It With Flagstone
Next, you need to fill the rest of the hole with gravel and make it perfectly flush with the ground around the bird bath base.
Instead of letting the gravel to overflow to hide the evidence of anchoring, we’re going to use beautiful flagstone to cover up the hole as a more attractive alternative.
You can purchase inexpensive interlocking flagstone from your local Lowe’s or Home Depot. Cut a hole in the center of the stone at the point where two interlocking stones meet. This way you’ll be able to lock the stones around the base of the birdbath while completely covering the hole.
Trust me when I tell you this is going to look stunning in your backyard.
Pedestal Slab Stabilizer: Step By Step Instructions
We’ll now take a closer look at the pedestal slab stabilizer method in our how to stabilize a bird bath quest. It requires a drill bit, a concrete slab, a screw gun, concrete screws, and the ability to lift a concrete block and use these tools.
If this sounds too complicated, consider hiring a handyman to help you out. With that said, check out the following steps:
Step #1: Put The Birdbath And Concrete Slab In Place
Have you located the perfect spot for your birdbath on your property? Place the concrete slab on the ground in the exact location that you intend to install the birdbath. Next, place the bird bath on top of the slab and make sure everything is level.
Step #2: Drill Your Holes
Next, you need to drill 4 holes in the base of the birdbath. It’s possible the manufacturer already drilled holes for metal stakes.
If this is the case, you can skip this step and use the predrilled holes that the manufacturer already created. If not, ensure the holes are evenly spaced from one another and make sure they’re perfectly uniform.
Step #3: Screw The Birdbath To The Concrete Slab
Pick up your screw gun and the first concrete screw. Screw it through the hole into the concrete slab. Make sure the bird bath is fastened tightly to the slab without any movement or shifting.
Repeat this process for the other three screws. After you’re finished, attempt to wiggle and move the bird bath to see if it’s fastened securely to the slab. If it still moves, consider drilling another hole or two to add additional screws for even greater support.
That’s all there is to it. If the concrete slab is heavy and thick enough, your bird bath shouldn’t go anywhere even in the nastiest snowstorms or windy weather.
Ground Leveling Method: A 5-Step Process
This 5-step process consists of:
- Choose a level location
- Measure the birdbath base
- Dig a hole 1-3 inches deep using the measurements
- Place the birdbath in the hole and hammer down the stakes
- Cover the hole with gravel, flagstone, dirt, etc.
Preferred Equipment & Materials for Bird Bath Anchoring
Having the proper equipment and tools for your “how to stabilize a bird bath “project is an absolute must to get the job done correctly. Depending on your technique of choice, you’d benefit from having the following items on hand:
- Spade shovel
- Gardening gloves
- Screw gun
- Drill bits
- Concrete screws
- Concrete blocks/slabs
- Flagstone slabs
- Gravel
- Ground soil
- Grass seeds
Best Practices to Hide the Evidence of Bird Bath Anchoring
After digging a hole using one of the bird bath anchoring processes above, you’ll likely want to hide the evidence. This will make your backyard look more attractive, neat, and tidy around the bird bath.
Some items or materials to use to hide the evidence of bird bath anchoring include:
- Grass seed to grow grass around the pedestal of the bird bath
- Your favorite flowers to place around the base of the pedestal
- Colorful gravel or stone colored gravel
- Interlocking flagstones (some stone cutting required)
- Glow-in-the-dark rocks
- Mixed pebbles
- Jelly bean fire glass
As you’ll see, every one of these options will very easily cover up the evidence of the hole you recently dug to secure the birdbath. Consider your choices and use the one that’ll make your backyard birdbath look absolutely amazing!
